Implementing continuous delivery pipelines with GitHub Actions
Date: 2023-08-02
The source code for this lab exercise is available on GitHub.
Continuous integration (CI) is the practice of building software from source and performing unit and integration tests in an automated fashion whenever source code changes are committed to a repository, while continuous deployment (CD) goes a step further by automatically deploying the updated software to a development and/or production environment as long as the latest software passes the entire test suite. They are collectively known as CI/CD, both of which aim to shorten the software development lifecycle, reduce the scope of manual operation and reduce the risk of human error through automation.

Continuous delivery, on the other hand, is almost identical to continuous deployment with one key difference - the final step of deploying the tested software to a production environment requires manual approval. While this may seem a step back from continuous deployment, it solves the issue that undesired changes to a software product may not always be caught by unit and integration tests by providing a buffer for management to decide whether a particular version of the software should be released to production even if fully functional.
GitHub is the top software-as-a-service (SaaS) platform featuring an integrated version control system (VCS) used by developers all around the world for hosting their software projects and code repositories, large and small, whether for public or private use and is home to many of the world’s largest and most influential open source projects forming the backbone of the modern Internet. Not surprisingly, it offers first-class support for fully customizable CI/CD pipelines and DevOps workflows through GitHub Actions, which supports both fully managed SaaS runners and self-managed custom runners for varying degrees of control over the environment used to execute your automated workflows.
In the lab to follow, we will be setting up an end-to-end DevOps workflow for a Flask microservice with GitHub Actions, using a self-managed custom runner for maximal control over the pipeline execution environment and automating deployments to a local Kubernetes cluster. Furthermore, we will construct separate pipelines for our “development” and “production” environments to further elaborate on the concepts of continuous deployment and delivery.
Lab: Setting up an end-to-end DevOps workflow for a Flask microservice
Prerequisites
A basic awareness of DevOps tools and methodologies, Git and Kubernetes is assumed. If not, consider enrolling in the following self-paced online courses offered by The Linux Foundation on edX at no cost:
- LFS162x: Introduction to DevOps and Site Reliability Engineering
- LFD109x: Git for Distributed Software Development
- LFS158x: Introduction to Kubernetes
You’ll also need access to an account on both GitHub and Docker Hub so sign up if you haven’t already done so.
Setting up your environment
You’ll need a Linux environment with at least 2 vCPUs and 4G of RAM. The reference distribution is Ubuntu 22.04 LTS, though the lab should work on most other Linux distributions as well with little to no modification.
We’ll generate an SSH key pair and set up the following tools:
- Docker
python3.10-venvfor setting up Python virtual environments- kind
- kubectl
Generating an SSH key pair
We’ll need an SSH key pair to push commits to GitHub from our local Git repository so generate one if you haven’t done so already:
ssh-keygen
Just press Enter a few times to accept the default options.
Installing Docker
Docker (hopefully) needs no introduction - simply install it from the system repositories and add yourself to the docker group:
sudo apt update && sudo apt install -y docker.io
sudo usermod -aG docker "${USER}"
Log out and back in for group membership to take effect.
Installing python3.10-venv
We’ll need the python3.10-venv package to create a Python virtual environment used for developing our Flask microservice, so install it from the system repositories:
sudo apt update && sudo apt install -y python3.10-venv
Installing kind
kind is a conformant Kubernetes distribution which runs entirely in Docker and is great for development, testing and educational purposes.
Let’s first create a user-specific directory for storing binaries and add it to our PATH so subsequent installation of software will not require sudo:
mkdir -p "$HOME/.local/bin/"
echo "export PATH=\"\$HOME/.local/bin:\$PATH\"" >> "$HOME/.bashrc"
source "$HOME/.bashrc"
Now fetch kind from upstream and make it executable - we’ll be using version 0.20.0:
wget -qO "$HOME/.local/bin/kind" https://github.com/kubernetes-sigs/kind/releases/download/v0.20.0/kind-linux-amd64
chmod +x "$HOME/.local/bin/kind"
Installing kubectl
kubectl is the official command-line tool for interacting with Kubernetes clusters.
Let’s fetch kubectl from upstream and make it executable - we’ll be using version 1.27.3:
wget -qO "$HOME/.local/bin/kubectl" https://dl.k8s.io/release/v1.27.3/bin/linux/amd64/kubectl
chmod +x "$HOME/.local/bin/kubectl"
You might also find it useful to enable Bash completion for kubectl, which can save you quite a bit of typing:
echo "source <(kubectl completion bash)" >> "$HOME/.bashrc"
source "$HOME/.bashrc"
Care must be taken to match the kubectl (client) version and Kubernetes cluster (server) version - in particular, the client must not fall behind the server by more than 1 minor version. We chose v1.27.3 for our kubectl client since kind v0.20.0 corresponds to Kubernetes version 1.27.3.
Verifying everything is installed correctly
Run the following commands to check the version of each tool we just installed:
docker --version
kind --version
kubectl version --client
Sample output:
Docker version 20.10.21, build 20.10.21-0ubuntu1~22.04.3
kind version 0.20.0
WARNING: This version information is deprecated and will be replaced with the output from kubectl version --short.  Use --output=yaml|json to get the full version.
Client Version: version.Info{Major:"1", Minor:"27", GitVersion:"v1.27.3", GitCommit:"25b4e43193bcda6c7328a6d147b1fb73a33f1598", GitTreeState:"clean", BuildDate:"2023-06-14T09:53:42Z", GoVersion:"go1.20.5", Compiler:"gc", Platform:"linux/amd64"}
Kustomize Version: v5.0.1
You can safely ignore any warnings printed to the console. As long as there are no errors, you should be good to go :-)
Creating the cluster
We’ll need to tweak the default configuration for kind this time, but otherwise creating a Kubernetes cluster with kind is very simple:
cat > actions-kind.yaml << EOF
kind: Cluster
apiVersion: kind.x-k8s.io/v1alpha4
name: actions-kind
networking:
  apiServerAddress: "0.0.0.0"
  apiServerPort: 6443
EOF
kind create cluster --config=actions-kind.yaml
Wait a minute or two for the cluster to become ready. In the meantime, let’s explore some of the options we tweaked:
networking.apiServerAddress: "0.0.0.0"- kind’skube-apiserveris configured to listen to the loopback interface by default for security reasons, since it’s meant as an educational tool and shouldn’t be used in production. However, for our use case of constructing a DevOps pipeline to deploy automatically to the cluster, we’ll need it to listen on all interfacesnetworking.apiServerPort: 6443- kind’skube-apiserveris exposed to the host at a high random-numbered port by default to facilitate spinning up multiple kind clusters; however, for the purposes of simplifying our pipeline, we’ll use the standard6443/tcpport
Now query the status of the cluster:
kubectl get no
Sample output:
NAME                         STATUS   ROLES           AGE   VERSION
actions-kind-control-plane   Ready    control-plane   27s   v1.27.3
Once the status appears as “Ready”, you should be good to go :-)
Setting up our repository and GitHub Actions runner
Now let’s log in to GitHub and create a private repository - let’s name it flask-ping-server.
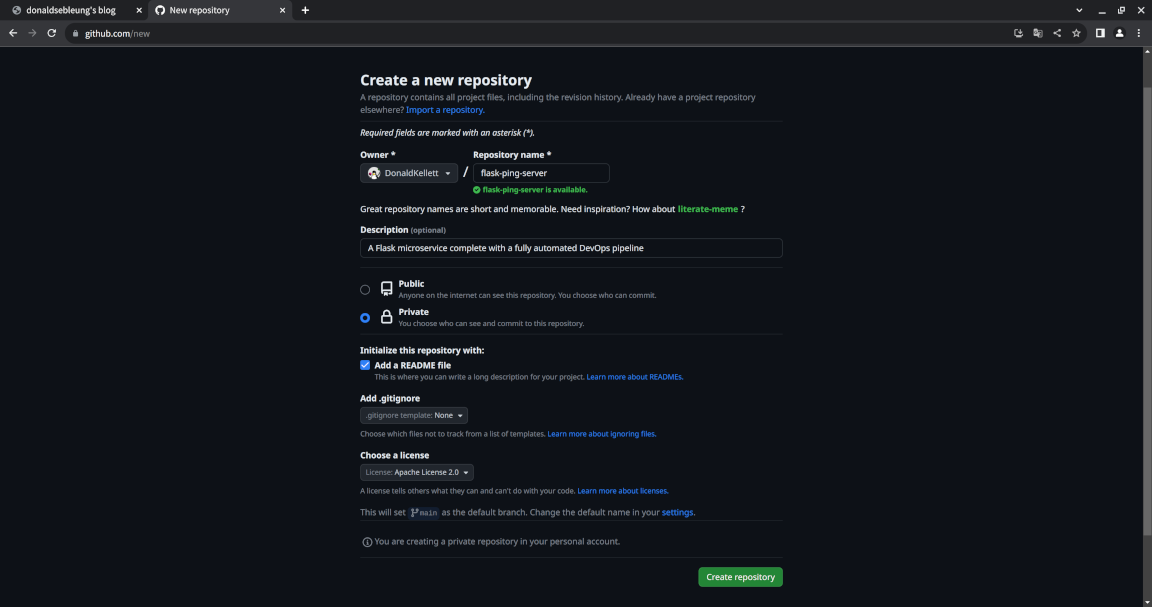
We’re making our repository private since with a self-managed runner, setting its visibility to public implies that an attacker could fork your repository and use it to run potentially malicious workflows on your runner.
Now let’s set up our runner. Note that this lab has three major components, all of which should be configured separately for production:
- The developer’s laptop / workstation for developing the Flask microservice locally and pushing commits to GitHub via
git - The self-managed GitHub Actions runner for executing our CI/CD pipelines
- The Kubernetes cluster to where the development and production workloads will be deployed
For the purposes of this lab, we’ll keep things simple and merge all of these components into the same Linux environment.
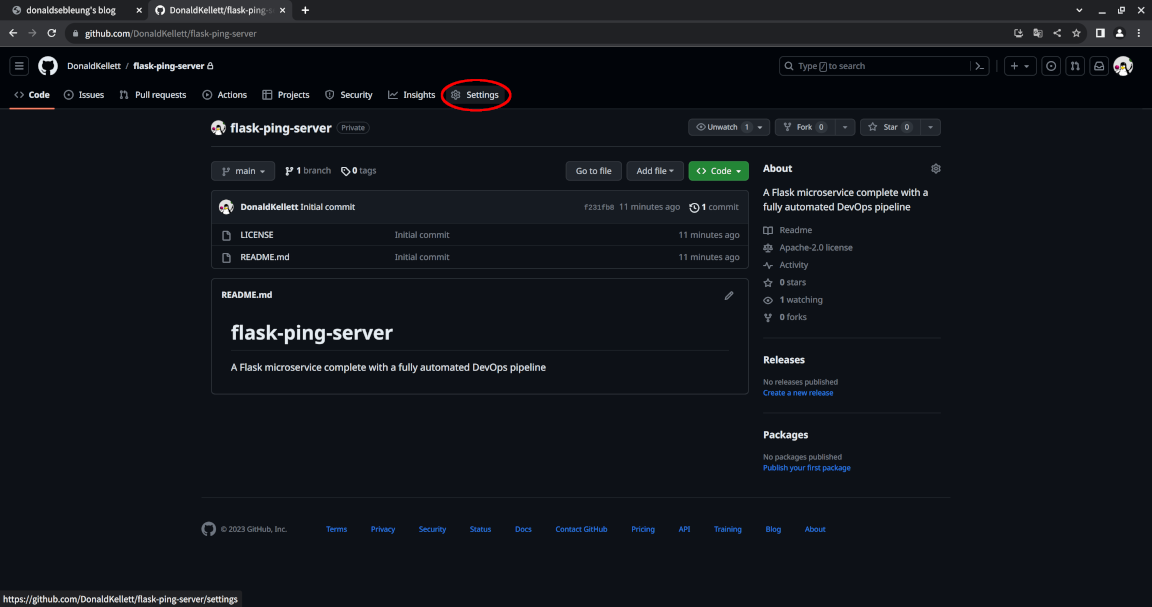
So we’ll set up the runner on the same machine running our kind Kubernetes cluster. To do this, find the “Settings” tab near the middle to the top of the page:
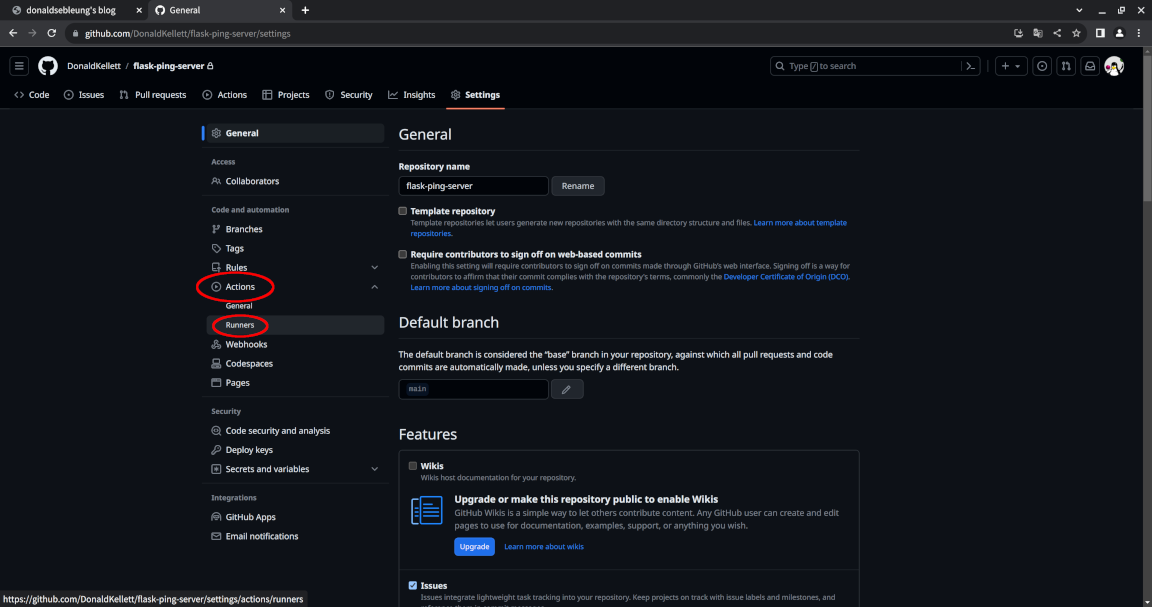
Select “Actions > Runners”:
Now click on “New self-hosted runner”:
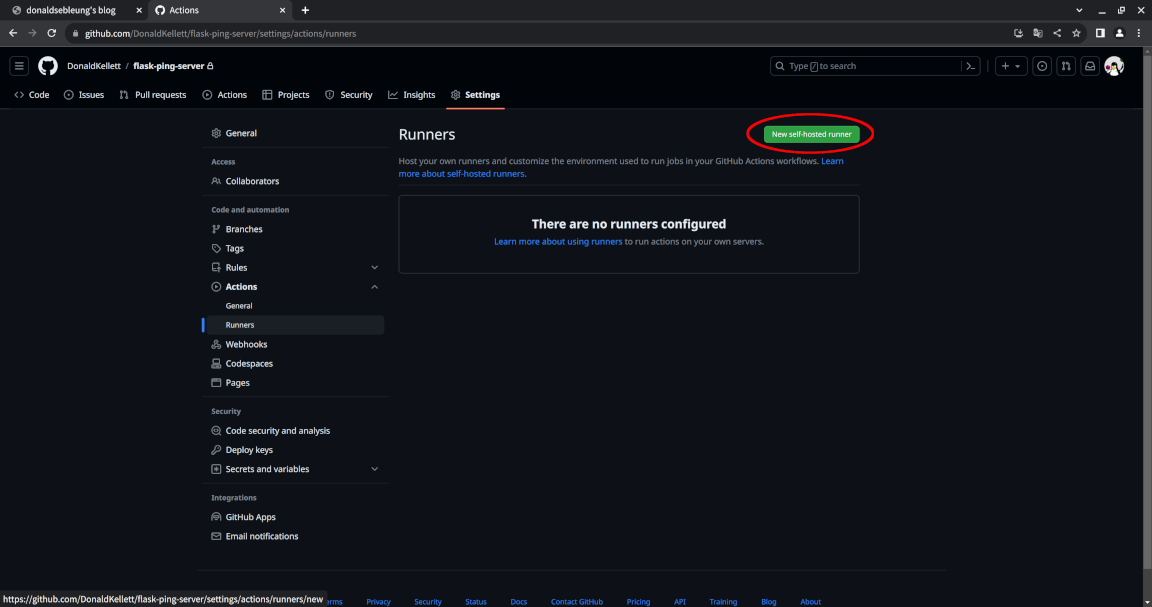
You should see the instructions for setting up the runner for your repository, including the token used for registration. The (slightly modified) commands are shown below for your convenience, minus the registration token (replace the x‘s with your token and JohnDoe with your GitHub username):
mkdir -p actions-runner/ && pushd actions-runner/
curl -o actions-runner-linux-x64-2.307.1.tar.gz -L https://github.com/actions/runner/releases/download/v2.307.1/actions-runner-linux-x64-2.307.1.tar.gz
echo "038c9e98b3912c5fd6d0b277f2e4266b2a10accc1ff8ff981b9971a8e76b5441  actions-runner-linux-x64-2.307.1.tar.gz" | shasum -a 256 -c
tar xzf ./actions-runner-linux-x64-2.307.1.tar.gz
export RUNNER_TOKEN="xxxxxxxxxxxxxxxxxxxxxxxxxxxxx"
echo "export GH_USERNAME=\"JohnDoe\"" >> "$HOME/.bashrc"
source "$HOME/.bashrc"
./config.sh --url "https://github.com/${GH_USERNAME}/flask-ping-server" --token "${RUNNER_TOKEN}"
popd
Press Enter a few times to accept the defaults and wait for the configuration to complete. You should now see a runner under “Settings > Actions > Runners” with the status “Offline”:
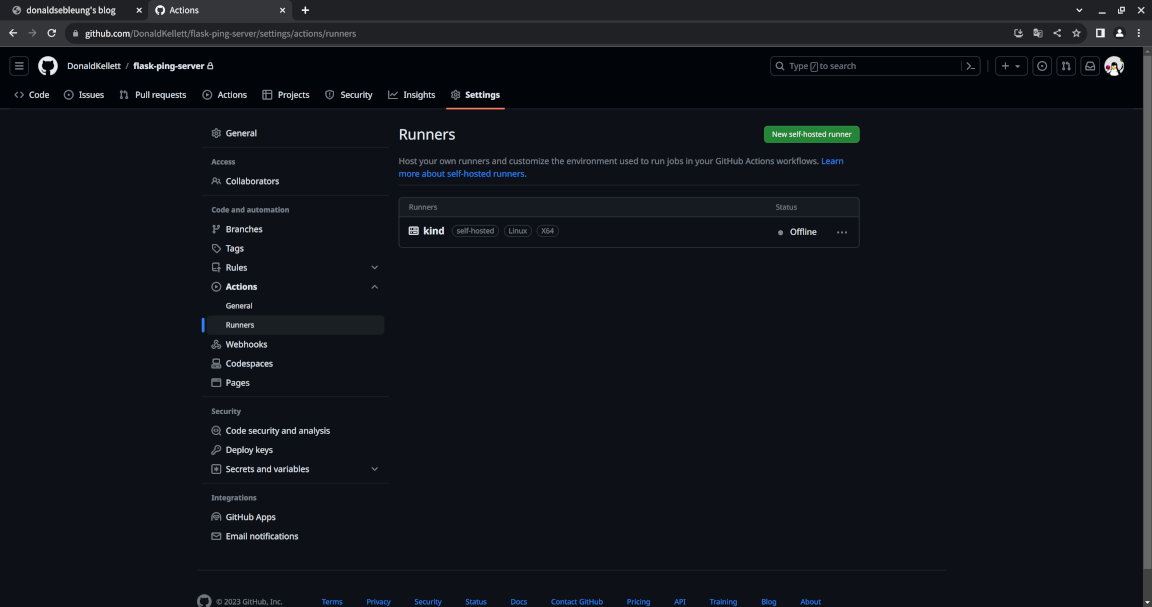
That’s because we’ve registered the runner but we haven’t actually started it yet. Instead of starting the runner directly, we’ll create a systemd service to run it automatically on systemd startup so the runner can survive across reboots:
cat << EOF | sudo tee /etc/systemd/system/github-actions-runner.service
[Unit]
Description=GitHub Actions runner

[Service]
WorkingDirectory=$HOME/actions-runner
ExecStart=/usr/bin/sudo -u $USER $HOME/actions-runner/run.sh

[Install]
WantedBy=multi-user.target
EOF
sudo systemctl daemon-reload
sudo systemctl enable --now github-actions-runner.service
Check the status of our service:
systemctl status --no-pager --full github-actions-runner.service
Sample output:
● github-actions-runner.service - GitHub Actions runner
     Loaded: loaded (/etc/systemd/system/github-actions-runner.service; enabled; vendor preset: enabled)
     Active: active (running) since Tue 2023-08-01 13:28:13 UTC; 7s ago
   Main PID: 7162 (sudo)
      Tasks: 17 (limit: 4557)
     Memory: 36.5M
        CPU: 1.814s
     CGroup: /system.slice/github-actions-runner.service
             ├─7162 /usr/bin/sudo -u dsleung /home/dsleung/actions-runner/run.sh
             ├─7163 /bin/bash /home/dsleung/actions-runner/run.sh
             ├─7167 /bin/bash /home/dsleung/actions-runner/run-helper.sh
             └─7171 /home/dsleung/actions-runner/bin/Runner.Listener run

Aug 01 13:28:13 kind systemd[1]: Started GitHub Actions runner.
Aug 01 13:28:13 kind sudo[7162]:     root : PWD=/home/dsleung/actions-runner ; USER=dsleung ; COMMAND=/home/dsleung/actions-runner/run.sh
Aug 01 13:28:13 kind sudo[7162]: pam_unix(sudo:session): session opened for user dsleung(uid=1000) by (uid=0)
Aug 01 13:28:15 kind sudo[7171]: √ Connected to GitHub
Aug 01 13:28:16 kind sudo[7171]: Current runner version: '2.307.1'
Aug 01 13:28:16 kind sudo[7171]: 2023-08-01 13:28:16Z: Listening for Jobs
If you see a status of active (running) then you should be good to go :-)
Cloning the repository locally and developing our Flask microservice
Do you want to develop an app? Because that’s precisely what we’re gonna do next ;-)

(Rick and Morty reference courtesy of Adult Swim)
Our microservice will exhibit the following behavior:
- It responds to
GET /ping/with the JSON payload{"message": "pong"} - It responds to
GET /version/with a JSON payload indicating the version of our app, e.g.{"version": "0.0.1"}
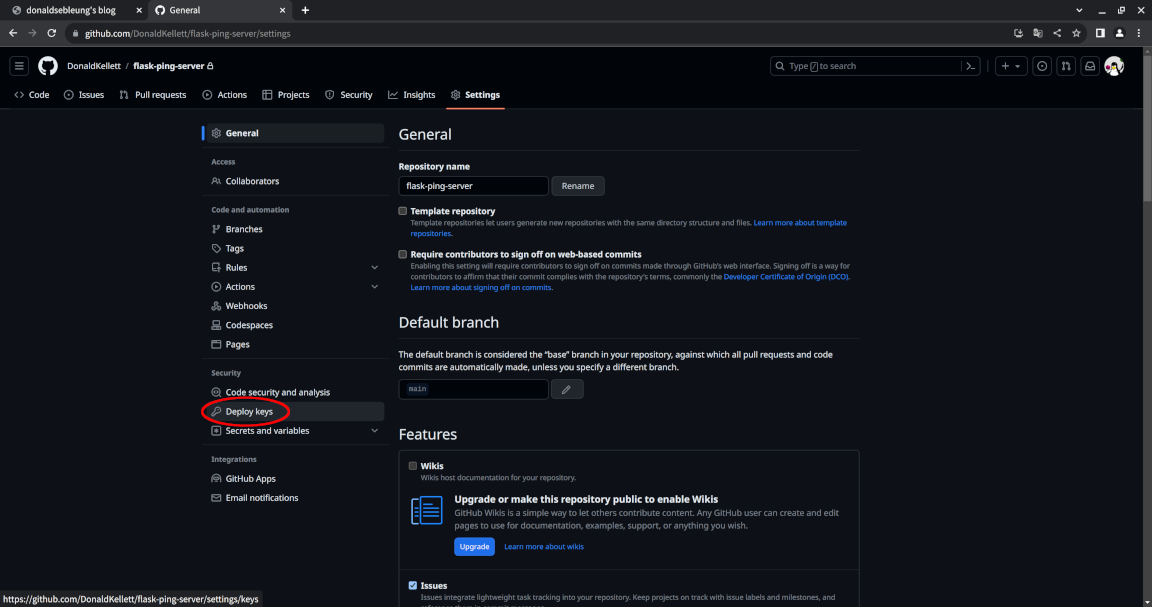
Clone your GitHub repo locally using Git. But before that, we need to add a deploy key to our repository.
Go to “Settings” again:
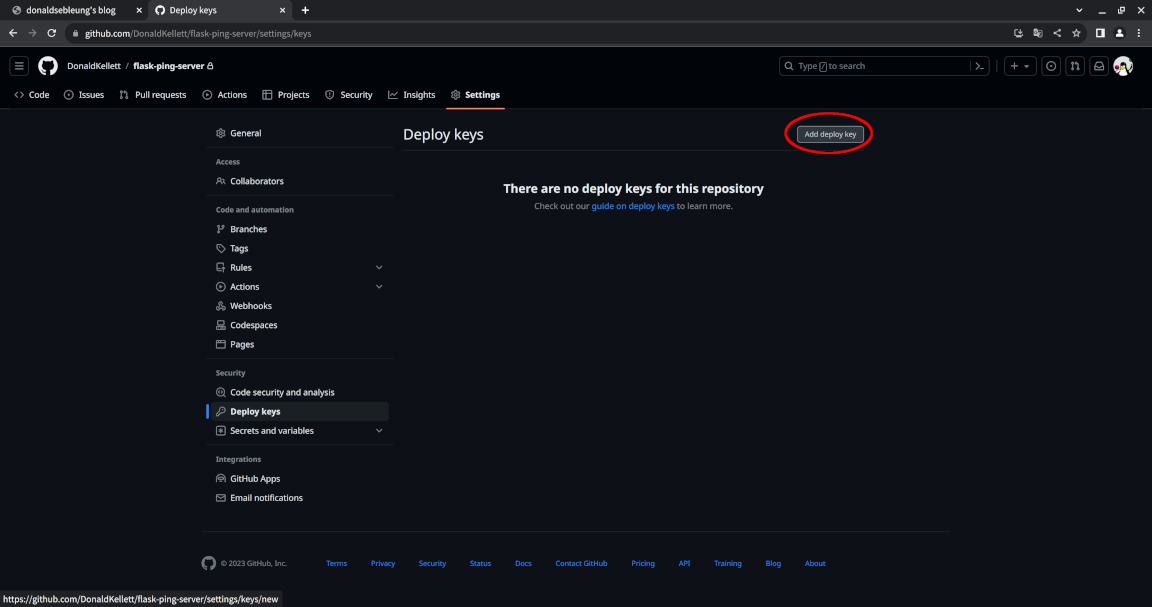
This time, select “Deploy keys” under “Security”:
Click “Add deploy key”:
Fill in a suitable title for your deploy key and paste in the contents of your SSH public key then click “Add key” - ensure the “Allow write access” option is checked:
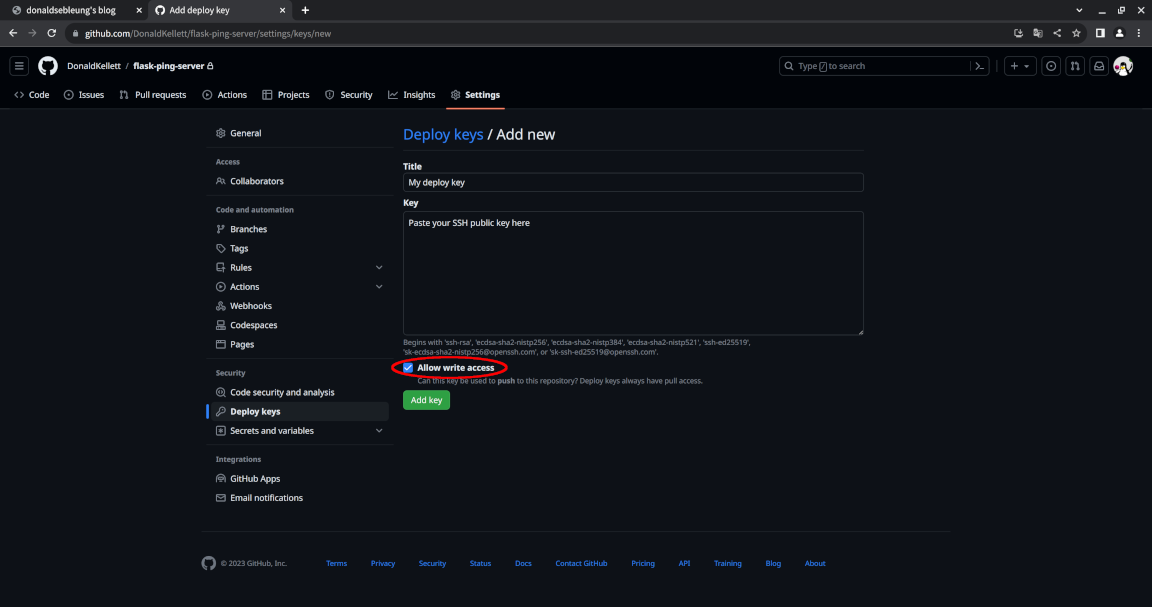
You can view the contents of your public key by running the following command:
cat "$HOME/.ssh/id_rsa.pub"
Now clone the repository locally using Git - replace johndoe below with your actual GitHub username:
echo "export GH_USERNAME=\"johndoe\"" >> "$HOME/.bashrc"
source "$HOME/.bashrc"
git clone "git@github.com:${GH_USERNAME}/flask-ping-server.git"
Enter the project directory:
pushd flask-ping-server/
Now create a virtual environment for developing our Flask microservice:
python3 -m venv .venv
. .venv/bin/activate
You should see (.venv) prepended to your existing prompt.
Install Flask for developing our microservice and pytest for unit testing:
pip install Flask
pip install pytest
Now write the list of dependencies installed into a file requirements.txt used by pip to reproduce the installation:
pip freeze > requirements.txt
Feel free to leave the virtual environment now:
deactivate
Also fill in our .gitignore file to ensure we only commit and push the necessary files to our GitHub repository:
cat > .gitignore << EOF
.venv
__pycache__
EOF
Now let’s fill in the code for our microservice including all the necessary unit tests. However, since developing a RESTful microservice with Flask isn’t the main point of this lab, we’ll simply skip through the development process with Bash:
mkdir -p project/ping/
cat > project/ping/__init__.py << EOF
from flask import Blueprint

ping_blueprint = Blueprint('ping', __name__, url_prefix='/ping')

from . import routes
EOF
cat > project/ping/routes.py << EOF
from . import ping_blueprint
from flask import Response
import json

@ping_blueprint.route('/')
def pong():
    return Response(json.dumps({ "message": "pong" }), mimetype='application/json')
EOF
mkdir -p project/version/
cat > project/version/__init__.py << EOF
from flask import Blueprint

version_blueprint = Blueprint('version', __name__, url_prefix='/version')

from . import routes
EOF
cat > project/version/routes.py << EOF
from . import version_blueprint
from flask import Response
import json

APP_VERSION='0.0.1'

@version_blueprint.route('/')
def get_app_version():
    return Response(json.dumps({ "version": APP_VERSION }), mimetype='application/json')
EOF
mkdir -p project/utils/
cat > project/utils/__init__.py << EOF
from flask import Flask
from project.ping import ping_blueprint
from project.version import version_blueprint

def create_app():
    app = Flask(__name__)
    app.register_blueprint(ping_blueprint)
    app.register_blueprint(version_blueprint)
    return app
EOF
mkdir -p tests/
touch tests/__init__.py
cat > tests/conftest.py << EOF
import pytest
from project.utils import create_app

@pytest.fixture()
def app():
    app = create_app()
    app.config.update({
        "TESTING": True,
    })
    yield app

@pytest.fixture()
def client(app):
    return app.test_client()
EOF
mkdir -p tests/app/
cat > tests/app/test_app.py << EOF
import json

def test_ping(client):
    response = client.get('/ping/')
    assert response.content_type == 'application/json'
    body = json.loads(response.data)
    assert 'message' in body
    assert body['message'] == 'pong'

def test_app_version(client):
    response = client.get('/version/')
    assert response.content_type == 'application/json'
    body = json.loads(response.data)
    assert 'version' in body
    assert body['version'] == '0.0.1'
EOF
cat > app.py << EOF
from project.utils import create_app

app = create_app()
EOF
Also fill in our Dockerfile for building the container image for our app:
cat > Dockerfile << EOF
FROM python:3.12-rc-bullseye
COPY requirements.txt /app/
COPY app.py /app/
COPY project/ /app/project/
WORKDIR /app/
RUN pip install -r requirements.txt
CMD ["flask", "run", "--host", "0.0.0.0"]
EOF
Now let’s commit our changes and push them to GitHub - replace John Doe and johndoe@example.com below with your actual full name and email address respectively:
git add .gitignore Dockerfile app.py project/ requirements.txt tests/
export YOUR_FULL_NAME="John Doe"
export YOUR_EMAIL_ADDRESS="johndoe@example.com"
git config --global user.name "${YOUR_FULL_NAME}"
git config --global user.email "${YOUR_EMAIL_ADDRESS}"
git commit -m "Add project files"
git push
Leave our application directory:
popd
If you reload the page now, you should see the project files appear in your GitHub repository:

We now have a modular codebase and unit tests to verify the functional correctness of our microservice as well as a Dockerfile to build a container image from our app, which is good and all, but something is missing - we don’t (yet) have an automated workflow to run the unit tests for us and deploy it to our development and production environments provided the unit tests pass.
We can do better - let’s add in such a workflow for our development environment ;-)
Constructing a continuous deployment pipeline for our development environment
We’ll a build a continuous deployment pipeline for our development environment - recall that continuous deployment refers to the practice of automating the entire workflow of running unit and integration tests, building the container image and deploying the app to our environment on every source code commit, all without any form of manual intervention whatsoever.
But before that, make sure you have a personal access token (PAT) for your Docker Hub account which is required as part of the continuous deployment pipeline - in fact, let’s generate one now.
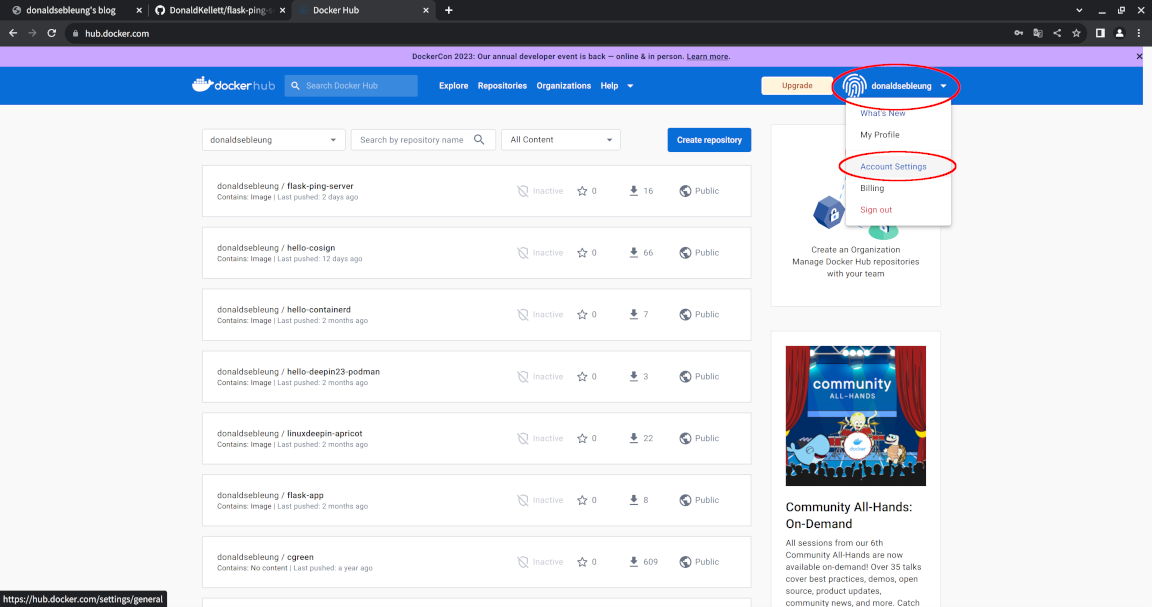
Log in to Docker Hub, select your username at the upper right hand corner and click “Account Settings”:
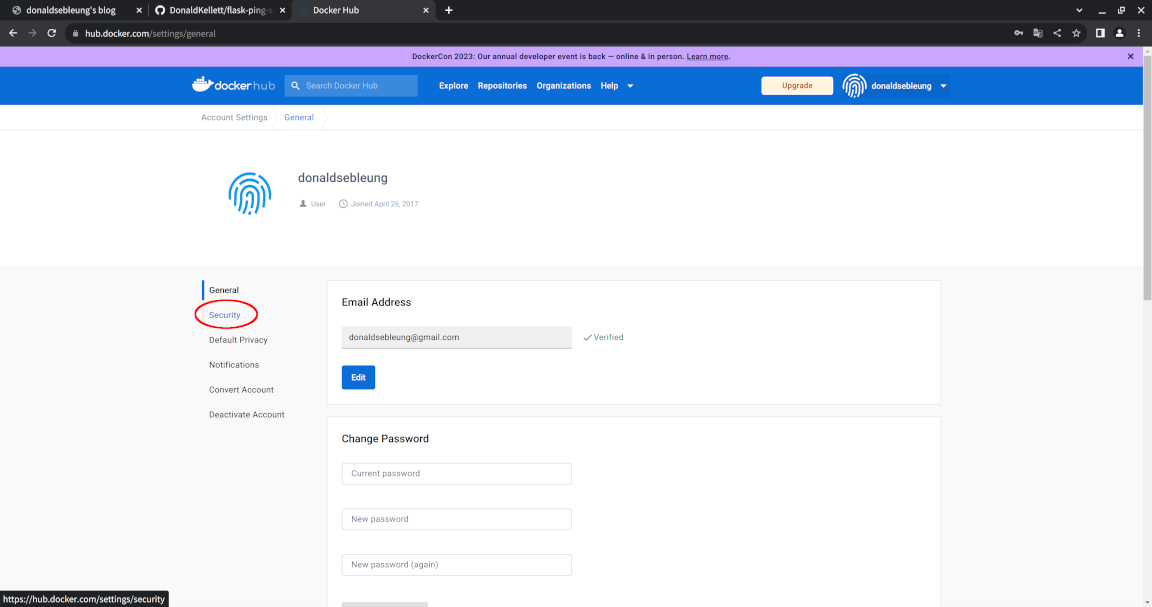
Now select the “Security” option to the left:
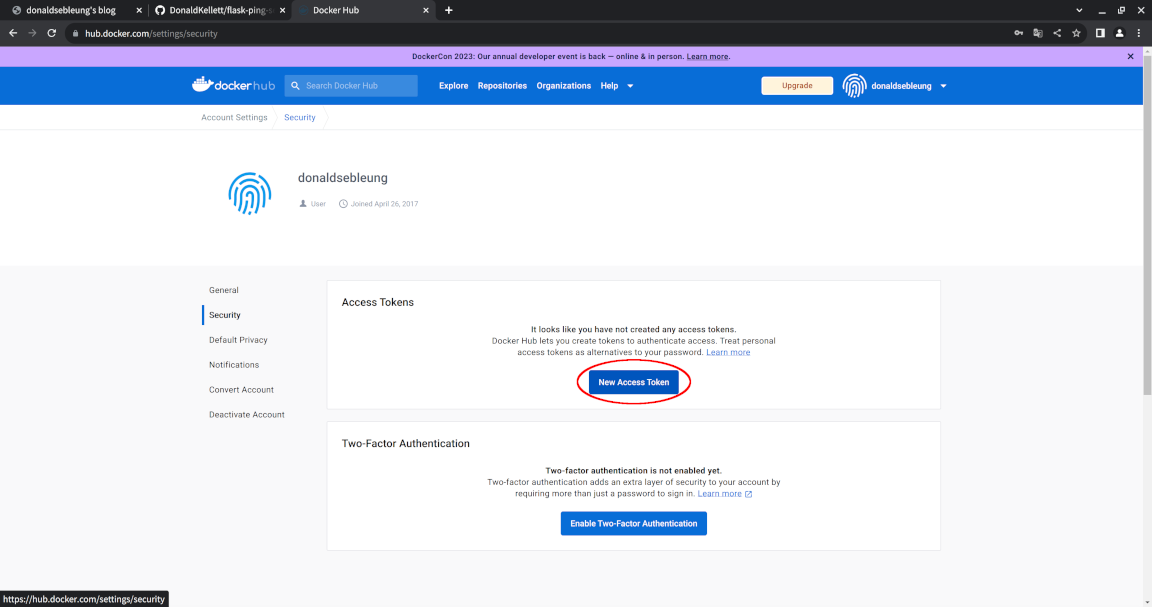
Click “New Access Token”:
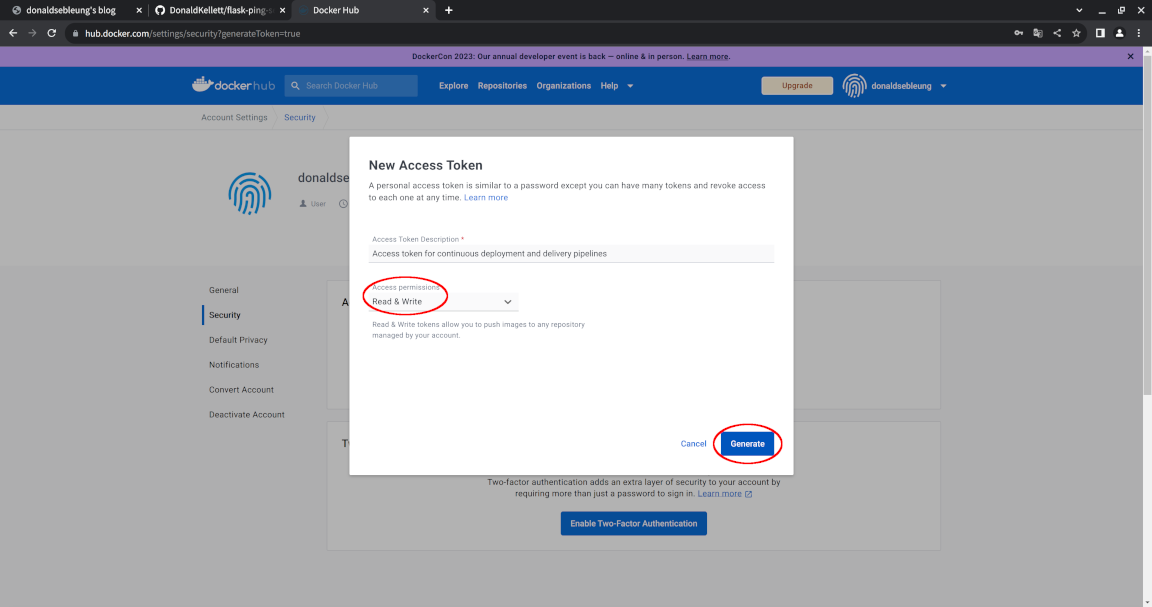
Now enter a suitable description for your token and change the access permissions to “Read, Write” since we won’t be deleting any images in our pipeline, then click “Generate”:
Keep your access token somewhere safe since we’ll need to refer to it later. You may now log out of Docker Hub.
Back in our kind cluster, let’s create a dev namespace for hosting our development workloads:
kubectl create ns dev
Now we need to create a ServiceAccount with just enough privileges to manage Deployments in our dev namespace (in accordance with the principle of least privilege) for use in our continuous deployment pipeline, along with the other associated Kubernetes objects. In particular, we need to:
- Create a Role describing the aforementioned privileges
- Create a ServiceAccount that our continuous deployment pipeline will assume for (re-)creating Deployments in the
devnamespace - Create a RoleBinding that grants our ServiceAccount the privileges mentioned in our Role
We’ll also create a Secret for Kubernetes to provide us a long-lived token representing our ServiceAccount so it doesn’t expire too quickly.
If you’re familiar with access control and management on public cloud platforms such as AWS or GCP, these Kubernetes objects roughly map to the following components in IAM:
- A Kubernetes Role corresponds to an IAM policy
- A Kubernetes ServiceAccount corresponds to an IAM role
- A Kubernetes RoleBinding corresponds to associating an IAM policy to an IAM role
Let’s go ahead and create them:
kubectl -n dev create role actions-dev \
    --verb=get \
    --verb=list \
    --verb=watch \
    --verb=create \
    --verb=update \
    --verb=patch \
    --verb=delete \
    --resource=deployments
kubectl -n dev create sa actions-dev
kubectl -n dev create rolebinding actions-dev \
    --role=actions-dev \
    --serviceaccount=dev:actions-dev
kubectl apply -f - << EOF
apiVersion: v1
kind: Secret
metadata:
  name: actions-dev-secret
  namespace: dev
  annotations:
    kubernetes.io/service-account.name: actions-dev
type: kubernetes.io/service-account-token
EOF
export ACTIONS_DEV_TOKEN="$(kubectl -n dev get secret actions-dev-secret -o jsonpath='{.data.token}' | base64 -d -)"
Now view our service account token and keep it somewhere safe since we’ll refer to it in a moment:
echo "${ACTIONS_DEV_TOKEN}"
Time to define our development pipeline:
- On every commit to the repository, run the unit tests to ensure the functional correctness of our microservice
- Only if all the unit tests pass, build a container image for our microservice and push it to Docker Hub
- Only if the image build and push process was successful, (re-)create a Deployment in the
devnamespace for our microservice
The YAML file defining our pipeline (and any other GitHub Actions workflows) resides in the .github/workflows/ directory - on every commit pushed to the upstream repository, GitHub automatically reads in all workflow files in that directory (if exists) and executes them as a collection of jobs.
Let’s enter our project directory again and create it with the commands below:
pushd flask-ping-server/
mkdir -p ./.github/workflows/
cat > ./.github/workflows/dev.yaml << EOF
name: Development workflow
run-name: Development workflow
on: [push]

jobs:
  unit-tests:
    runs-on: self-hosted
    container:
      image: python:3.12-rc-bullseye
    steps:
    - name: Check out repository code
      uses: actions/checkout@v3
    - name: Install pip requirements
      run: |
        pip install -r requirements.txt
    - name: Run unit tests
      run: |
        python3 -m pytest -v
  image-build:
    runs-on: self-hosted
    needs: [unit-tests]
    steps:
    - name: Set up QEMU
      uses: docker/setup-qemu-action@v2
    - name: Set up Docker Buildx
      uses: docker/setup-buildx-action@v2
    - name: Login to Docker Hub
      uses: docker/login-action@v2
      with:
        username: \${{ secrets.DOCKERHUB_USERNAME }}
        password: \${{ secrets.DOCKERHUB_TOKEN }}
    - name: Build and push
      uses: docker/build-push-action@v4
      with:
        push: true
        tags: \${{ secrets.DOCKERHUB_USERNAME }}/flask-ping-server:latest
  deploy-to-dev:
    runs-on: self-hosted
    needs: [image-build]
    container:
      image: ubuntu:22.04
    steps:
    - name: Install dependencies
      run: |
        apt-get update && apt-get install -y wget
        wget -qO "/usr/local/bin/kubectl" https://dl.k8s.io/release/v1.27.3/bin/linux/amd64/kubectl
        chmod +x "/usr/local/bin/kubectl"
        kubectl config set-cluster kind-actions-kind --server=https://172.17.0.1:6443/ --insecure-skip-tls-verify=true
        kubectl config set-credentials actions-dev --token="\${{ secrets.ACTIONS_DEV_TOKEN }}"
        kubectl config set-context actions-dev --user=actions-dev --cluster=kind-actions-kind --namespace=dev
        kubectl config use-context actions-dev
    - name: Deploy to dev namespace
      run: |
        kubectl create deploy flask-ping-server --image=\${{ secrets.DOCKERHUB_USERNAME }}/flask-ping-server:latest --replicas=2 --port=5000 --dry-run=client -o yaml > flask-ping-server.yaml
        kubectl replace --force -f flask-ping-server.yaml
EOF
Before we commit this file and push it to our upstream repository, we’ll need to visit GitHub and add the following secrets to our repository so GitHub Actions can use them transparently and securely:
DOCKERHUB_USERNAME- your username on Docker HubDOCKERHUB_TOKEN- the Docker Hub PAT we created earlierACTIONS_DEV_TOKEN- the token allowing our pipeline to assume the ServiceAccount we just created for (re-)deploying the latest revision of our microservice to our Kubernetes cluster
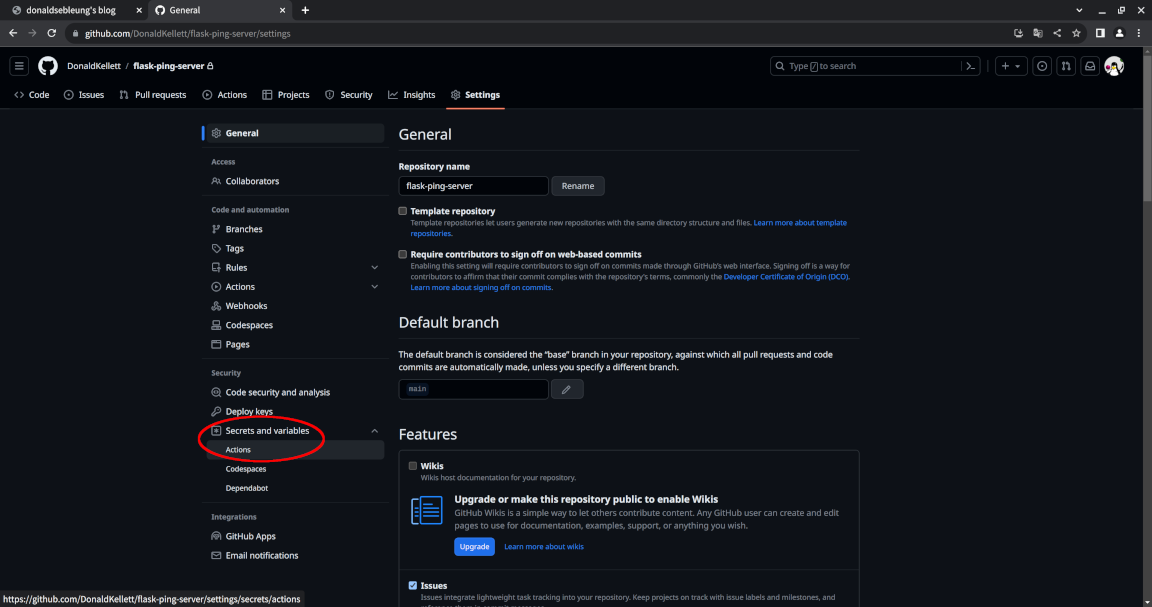
Ensure you are logged in to GitHub, then navigate to your flask-ping-server repository and select “Settings”:
Now select “Secrets and variables > Actions” under “Security” to the left:
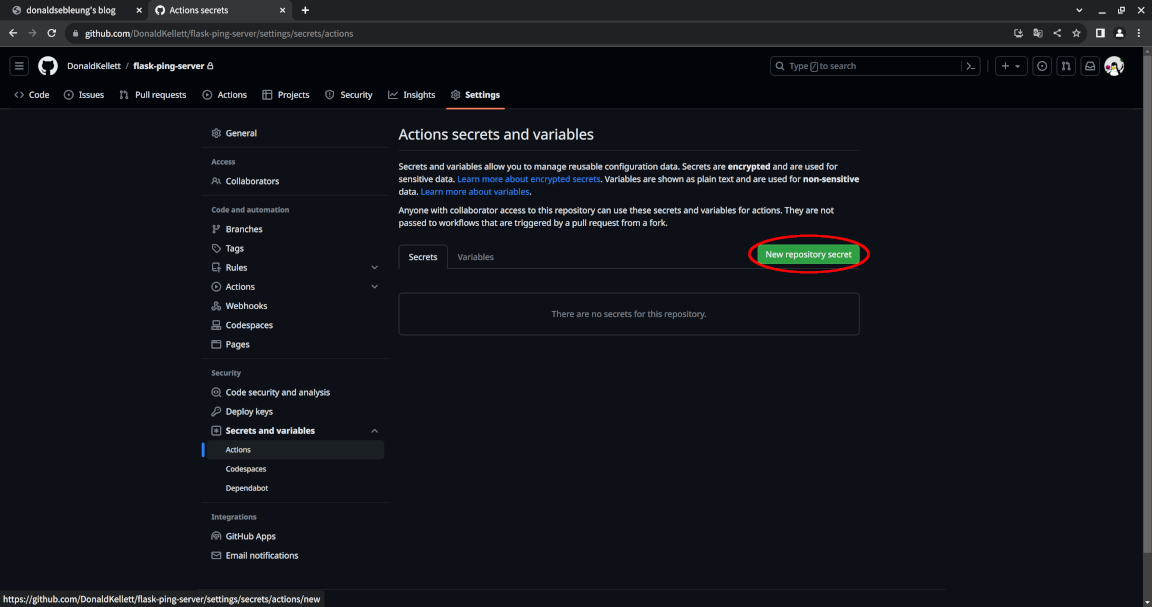
Click on “New repository secret”:
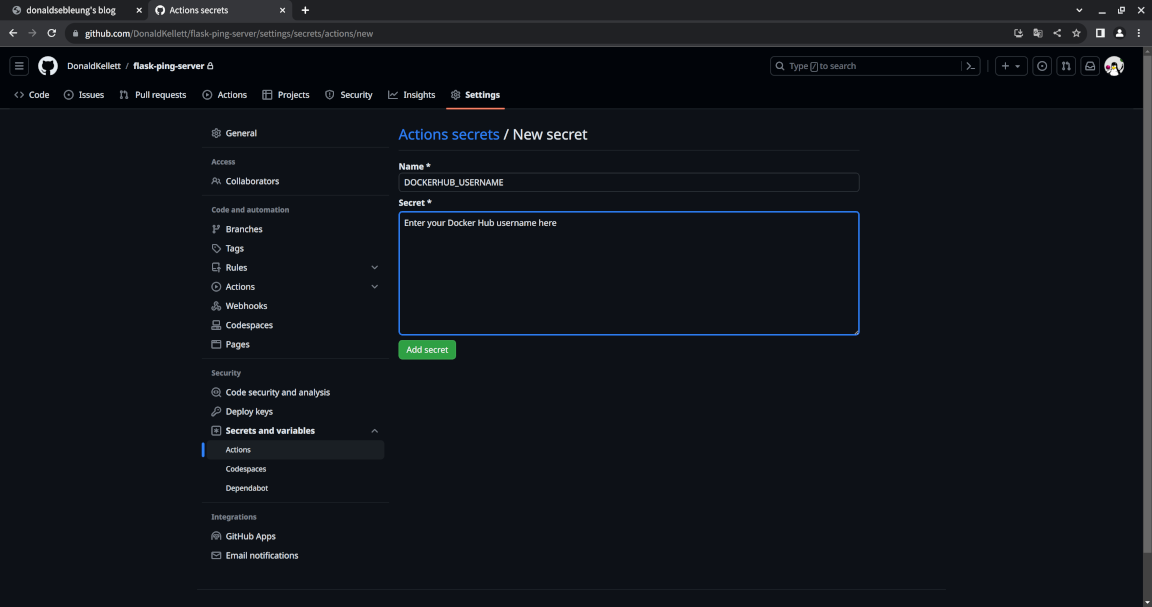
Fill in DOCKERHUB_USERNAME for the name and enter your Docker Hub username for the secret itself and click “Add secret”:
Now repeat the action for the other two secrets we mentioned above. Once you’re done, you should see the following page:
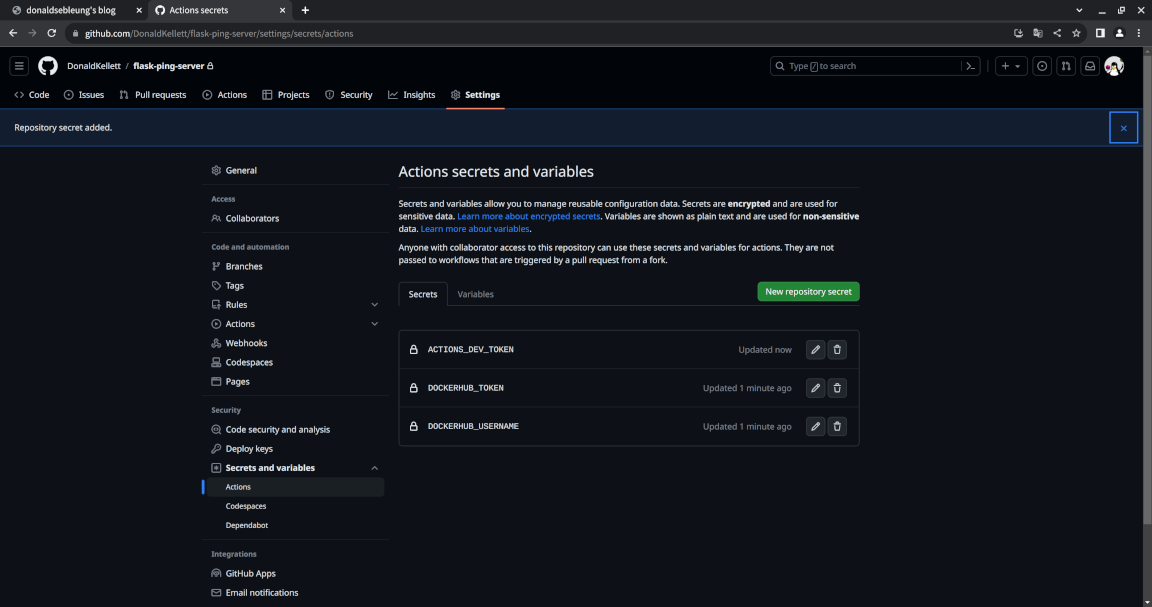
Note that by design, even if you decide to edit your secrets afterwards, you cannot obtain their previous values - you can only update the secret with a completely new value.
Now we can safely commit our changes and push them to our upstream repository:
git add .github/
git commit -m "Add development pipeline"
git push
You may now leave our project directory:
popd
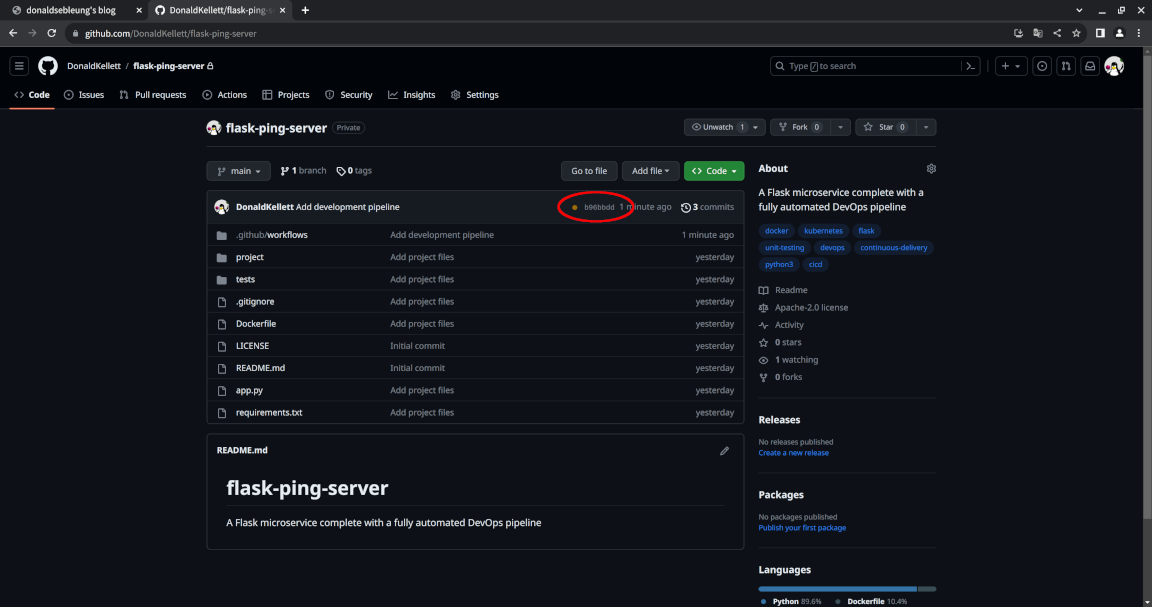
Now visit the homepage for our project repository again - we should see a yellow circle next to our commit which indicates our continuous deployment pipeline is running:
Wait a few minutes, maybe 10-15 minutes, then refresh the page and you should see the yellow circle replaced with a green checkmark:
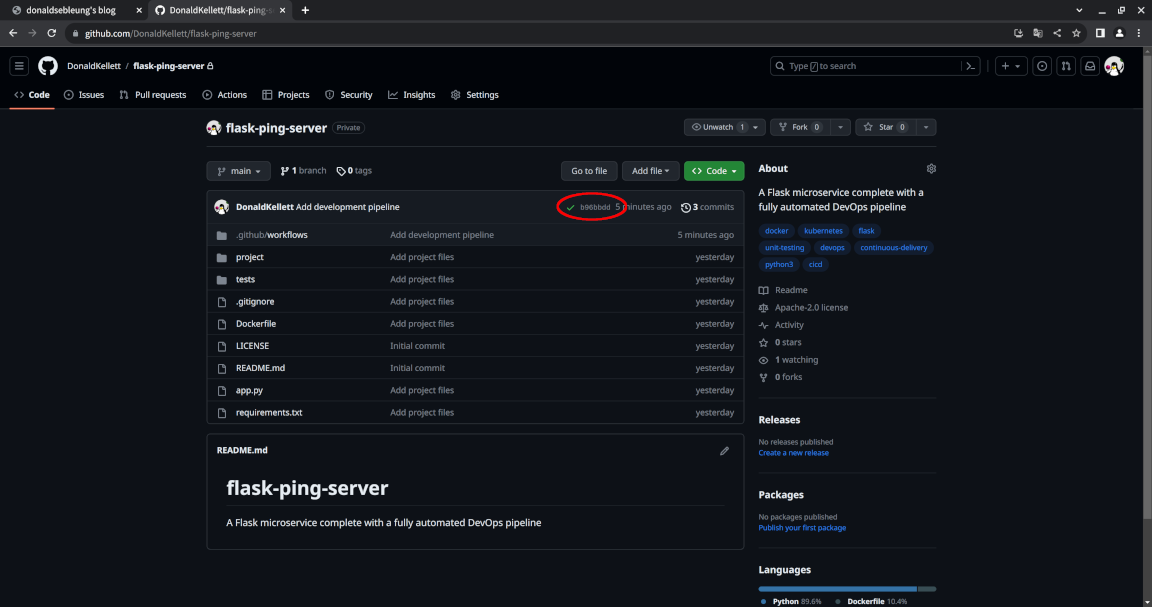
Congratulations! This means that your continuous deployment pipeline has executed to completion and you should now see a Deployment named flask-ping-server created in our dev namespace:
kubectl -n dev get deploy
Sample output:
NAME                READY   UP-TO-DATE   AVAILABLE   AGE
flask-ping-server   2/2     2            2           6m13s
In fact, let’s see it in action ;-)
Expose our Deployment with a Service:
kubectl -n dev expose deploy flask-ping-server --port=80 --target-port=5000
Now spin up a Pod with curl installed for testing our microservices:
kubectl run curlpod --image=curlimages/curl -- sleep infinity
And send a GET /ping/ request to our Service:
kubectl exec curlpod -- curl -s http://flask-ping-server.dev/ping/
Sample output:
{"message": "pong"}
Let’s also confirm that our microservice returns its version number correctly:
kubectl exec curlpod -- curl -s http://flask-ping-server.dev/version/
Sample output:
{"version": "0.0.1"}
Excellent! Let’s now move on to our production pipeline, which will use continuous delivery instead of continuous deployment.
Constructing a continuous delivery pipeline for our production environment
Recall that the main difference between continuous deployment and continuous delivery is that the former is fully automated, but the latter introduces a “manual approval” step which serves as a buffer for management to decide which working version of our microservice to release to production as “stable”.
Again, we’ll create our prod namespace for production deployments:
kubectl create ns prod
Now create a Role, ServiceAccount and RoleBinding like we did for our development environment, and create a long-lived token via a Secret:
kubectl -n prod create role actions-prod \
    --verb=get \
    --verb=list \
    --verb=watch \
    --verb=create \
    --verb=update \
    --verb=patch \
    --verb=delete \
    --resource=deployments
kubectl -n prod create sa actions-prod
kubectl -n prod create rolebinding actions-prod \
    --role=actions-prod \
    --serviceaccount=prod:actions-prod
kubectl apply -f - << EOF
apiVersion: v1
kind: Secret
metadata:
  name: actions-prod-secret
  namespace: prod
  annotations:
    kubernetes.io/service-account.name: actions-prod
type: kubernetes.io/service-account-token
EOF
export ACTIONS_PROD_TOKEN="$(kubectl -n prod get secret actions-prod-secret -o jsonpath='{.data.token}' | base64 -d -)"
Again, make note of our ServiceAccount token:
echo "${ACTIONS_PROD_TOKEN}"
Now enter our project directory and create our production workflow YAML file:
pushd flask-ping-server/
cat > ./.github/workflows/prod.yaml << EOF
name: Production workflow
run-name: Production workflow
on:
  release:
    types: [published]

jobs:
  unit-tests:
    runs-on: self-hosted
    container:
      image: python:3.12-rc-bullseye
    steps:
    - name: Check out repository code
      uses: actions/checkout@v3
    - name: Install pip requirements
      run: |
        pip install -r requirements.txt
    - name: Run unit tests
      run: |
        python3 -m pytest -v
  image-build:
    runs-on: self-hosted
    needs: [unit-tests]
    steps:
    - name: Set up QEMU
      uses: docker/setup-qemu-action@v2
    - name: Set up Docker Buildx
      uses: docker/setup-buildx-action@v2
    - name: Login to Docker Hub
      uses: docker/login-action@v2
      with:
        username: \${{ secrets.DOCKERHUB_USERNAME }}
        password: \${{ secrets.DOCKERHUB_TOKEN }}
    - name: Build and push
      uses: docker/build-push-action@v4
      with:
        push: true
        tags: \${{ secrets.DOCKERHUB_USERNAME }}/flask-ping-server:\${{ github.event.release.tag_name }}
  deploy-to-prod:
    runs-on: self-hosted
    needs: [image-build]
    container:
      image: ubuntu:22.04
    steps:
    - name: Install dependencies
      run: |
        apt-get update && apt-get install -y wget
        wget -qO "/usr/local/bin/kubectl" https://dl.k8s.io/release/v1.27.3/bin/linux/amd64/kubectl
        chmod +x "/usr/local/bin/kubectl"
        kubectl config set-cluster kind-actions-kind --server=https://172.17.0.1:6443/ --insecure-skip-tls-verify=true
        kubectl config set-credentials actions-prod --token="\${{ secrets.ACTIONS_PROD_TOKEN }}"
        kubectl config set-context actions-prod --user=actions-prod --cluster=kind-actions-kind --namespace=prod
        kubectl config use-context actions-prod
    - name: Deploy to prod namespace
      run: |
        kubectl create deploy flask-ping-server --image=\${{ secrets.DOCKERHUB_USERNAME }}/flask-ping-server:\${{ github.event.release.tag_name }} --replicas=2 --port=5000 --dry-run=client -o yaml > flask-ping-server.yaml
        kubectl apply -f flask-ping-server.yaml
EOF
The main differences compared to our development workflow is as follows:
- Instead of running the workflow on every pushed commit (
on: [push]), we will run our production workflow on every published (stable) releaseon.release.types: [published]. This action of tagging a stable release represents the “manual approval” component of our continuous delivery pipeline - This time, we tag our container image with a proper version tag representing our stable release instead of
latest - Instead of forcefully replacing our Deployment with
kubectl replace --forcewhich could lead to service interruption, we usekubectl applyinstead to gracefully roll over our production deployment to the new stable version of our microservice
Again, before committing the changes and pushing them to the remote repository, make sure to add the ACTIONS_PROD_TOKEN secret to your GitHub repository.
Now commit and push the changes to our remote repository:
git add .github/
git commit -m "Add production pipeline"
git push
Feel free to leave our project directory for the last time:
popd
You should still see the development pipeline triggered but not the production pipeline. That’s because our production pipeline is only triggered when we tag a commit as a stable release.
Wait for our development pipeline to finish anyway. Once you see a green checkmark, proceed with creating a versioned release for our microservice.
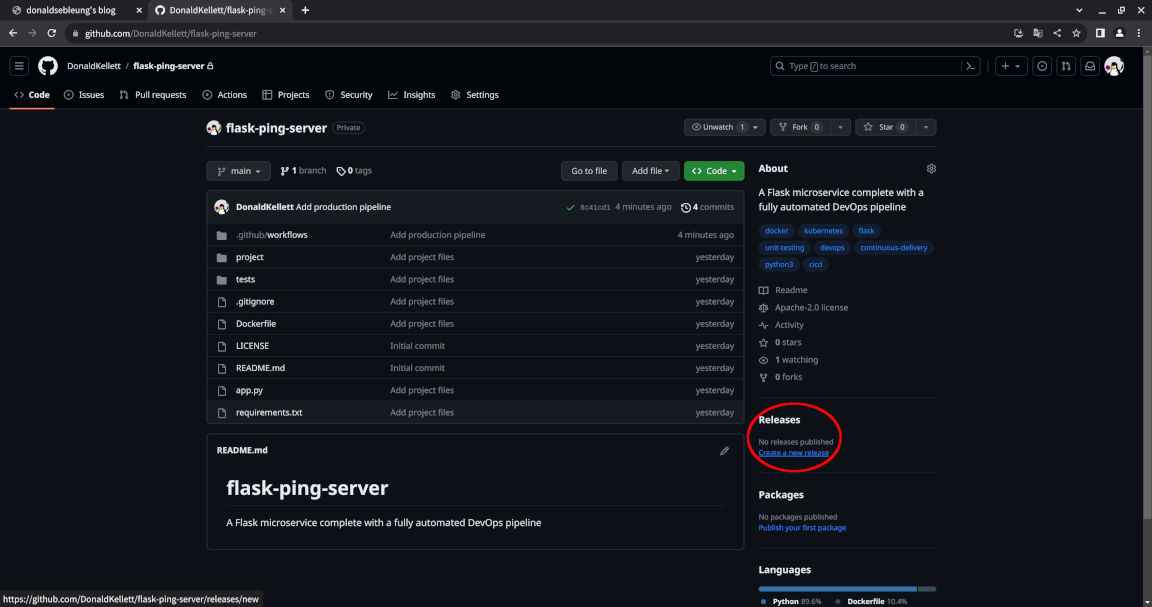
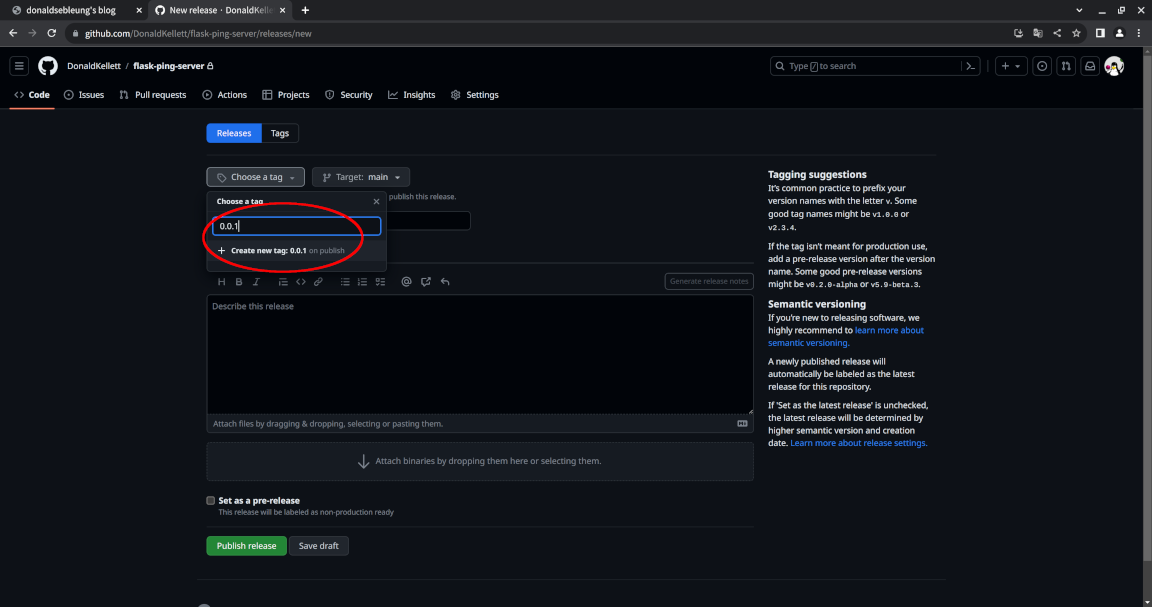
To the right of the page, select “Create a new release”:
For “Choose a tag”, type in 0.0.1 and select “Create new tag: 0.0.1”:
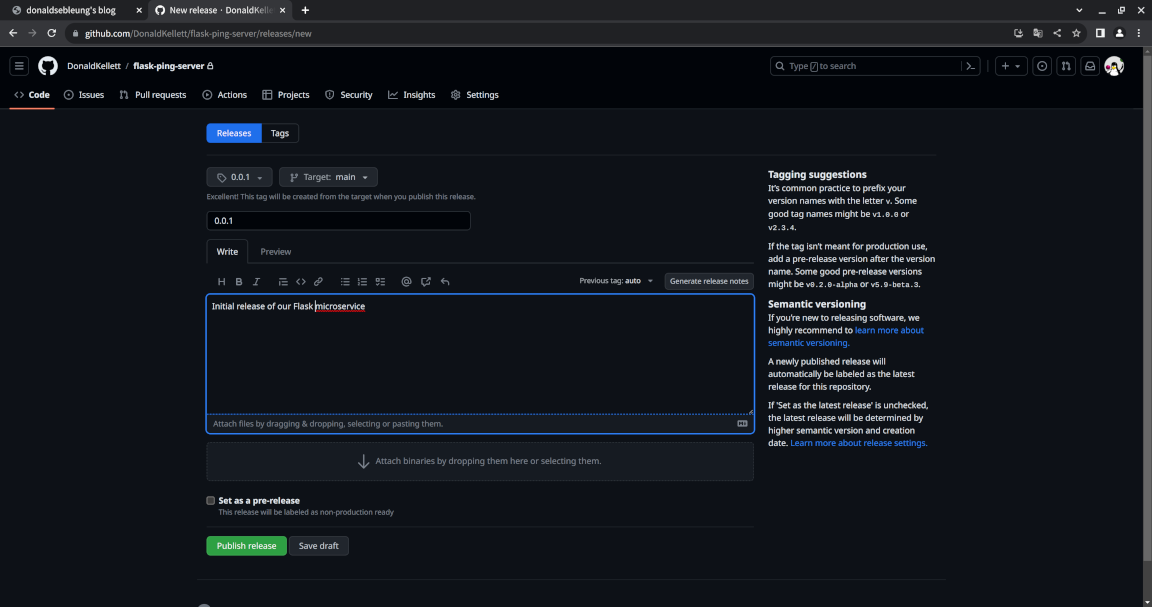
Fill in a suitable name and description for our release, then click “Publish release”:
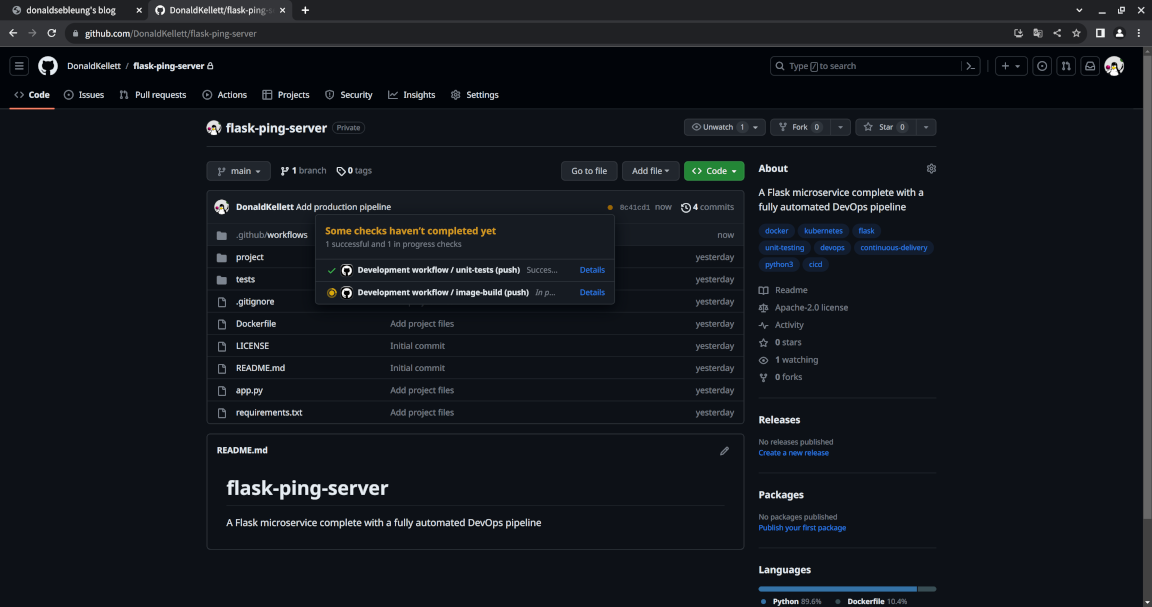
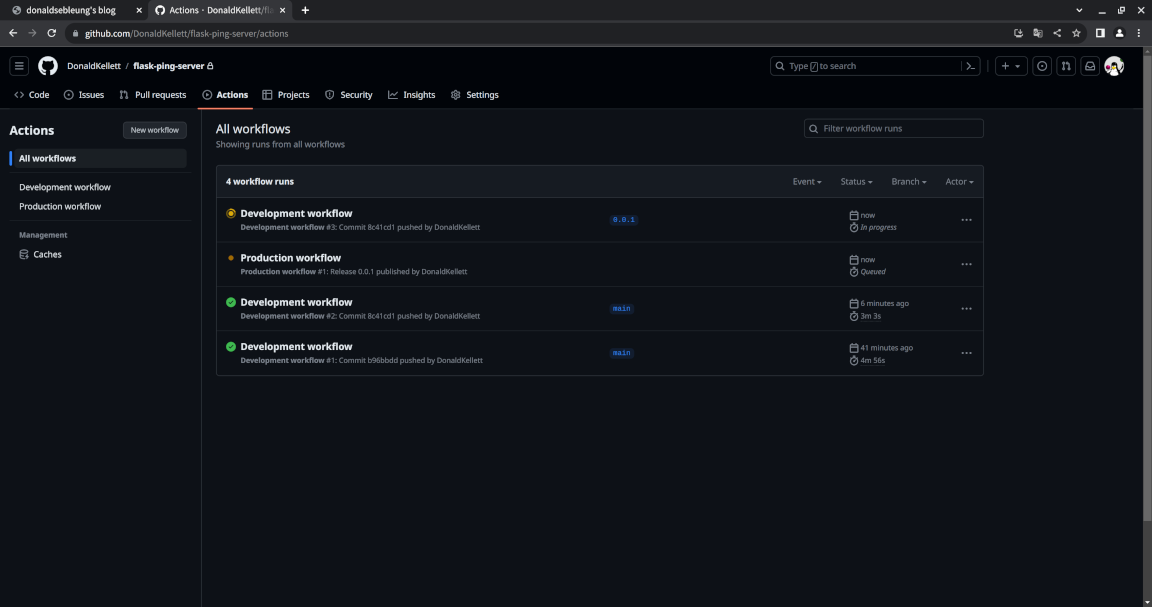
Now go to the “Actions” tab from the homepage of our repository, and you should see our production pipeline queued for execution along with our development pipeline which was triggered again:
After your production pipeline goes green, verify the results again in our cluster:
kubectl -n prod get deploy
kubectl -n prod expose deploy flask-ping-server --port=80 --target-port=5000
kubectl exec curlpod -- curl -s http://flask-ping-server.prod/ping/
kubectl exec curlpod -- curl -s http://flask-ping-server.prod/version/
Concluding remarks and going further
I hope you enjoyed this introduction to DevOps, CI/CD pipelines and continuous delivery. While setting up this pipeline isn’t exactly trivial, we could do better by integrating security into our DevOps pipeline as a first-class citizen in order to protect your software delivery chain from software supply chain attacks - this concept is covered in detail in another blog post of mine: Securing your Kubernetes workloads with Sigstore
Stay tuned for more content and I hope to see you again in a future article ;-)
Subscribe:
![]()
![]()
![[Valid RSS]](/assets/images/valid-rss-rogers.png)
![[Valid Atom 1.0]](/assets/images/valid-atom.png)